
I think it was 2009 when I first started honing my homemade pizza skills. I was home for the weekend (an environment that always triggers exploration in the kitchen), and I decided not only was I going to make pizza from scratch, I was going to grill it. Suffice it to say most of the dough ended up in between the coals, and my pizza more so resembled a cut-out of the state of Florida rather than a round pie. But despite its shape and the lightened load of toppings, it was still good. Really good.
I trudged onward, attempting homemade pizza back in my own kitchen in an oven. The dough got better but the pie was largely raw, due to the fact that I hadn’t preheated my oven properly. Again though, it was still pretty good. Not perfection, but progress.
I had a handful more experiences of this kind. I wrestled with dough, unsuccessfully transferred my pie to the oven countless times, produced pies that were burned on the top and raw on the bottom (and vice versa), and so forth. But there was something about the process that was still enjoyable. At the onset, I remember quietly thinking to myself that the pizza I made at home was probably not going to be good….for a while. But that the only way to get over the hump of it not being good was to practice. A lot. Instead of focusing on the failure, I focused on the small improvements that were made with each pie, recognizing there was simply no way around them. That doesn’t mean I didn’t spend a good portion of those attempts cursing the dough recipe, yelling at whoever was nearby to help (apologies to those involved), and angrily throwing yet another pizza away in a fit of rage. That definitely all still happened. But somehow, I was driven to keep trying, to the point where homemade pizza now falls into the category of simple weeknight meals for me. The pies aren’t always in the shape of a circle, but you guys, they are really freaking good. #patsselfonback
This realization around my pizza making journey was triggered a few weeks back when my therapist challenged me to think about failure. She specifically wanted me to think about the areas of my life where I easily accept failure as part of the learning process, and others where I leave zero room for it. Pizza dough, and cooking in general, is one of the areas I leave room, as is yoga. And not only do I leave room, but I still really enjoy the process of honing my skills in these areas – even when I’ve failed countless times.
Yoga presents an interesting comparison as well. I got back into my practice this September. Having danced a lot growing up, I’m naturally pretty flexible, but I’ve always struggled with any strength based balancing poses. So I decided I’d just start with crow pose as a goal, figuring of all the balancing poses, that was the easiest one. During each class when my instructor would encourage everyone to attempt handstands, headstands, etc. I’d focus solely on getting into crow pose. And then a few months in, while in a completely different sequence, my body somehow found its way into flying pigeon. Albeit, not as good as that photo, but still. I was in shock. And yet somehow, it felt so natural. It was like everything suddenly clicked. The very nature of consistent practice allowed the progress to happen organically. Rather than being forced, my body found its way into the position on its own.
From a physical perspective, the same thing happened with homemade pizza. The reason it’s now easier is because my hands are more familiar with the process, regardless of whether I’m getting the dough to rise, kneading it, morphing it into a pie-esuqe shape, adding just the right amount of toppings, and so forth. I was reminded of how everything had already clicked when I succeeded in making this pie last weekend. It’s been over a year since I’ve made pizza from scratch (more on that later), and yet it was like riding a bike. My hands knew exactly what to do. The meal was divine.
But then back to failure. No, I’m not ready to throw my hands up and readily welcome failure in all forms. But I am more inclined to trust in the process, and accept that failure is an inevitable part of that process. And for those areas where I’ve left zero room for it, I’ve also realized I’ve left zero room for growth. Ironic how that plays out. xx Clara
Click through for the recipe…
Classic Margherita Pizza
I’ve worked with a variety of different dough recipes over the years. For this recipe I tried out Ashley Rodriguez’s version from her amazing new cookbook, but I did it using a standmixer. If you don’t have a standmixer, I recommend Smitten Kitchen’s Really Simple Homemade Pizza dough. I’ve also used Ina Garten’s recipe, and found that to produce an easy to work with dough when done with a standmixer.
Here is Ashley’s Recipe (Note: I encourage to double or triple the recipe, and then freeze the balls into individual pies):
Olive Oil Pizza Dough (makes 2 12 inch pizzas)
- 1 tsp active dry yeast
- 1/2 tsp granulated sugar
- 2 tablespoons olive oil
- 3/4 cup lukewarm water
- 2 1/4 cups all purpose flour
- 1 1/2 tsp kosher salt
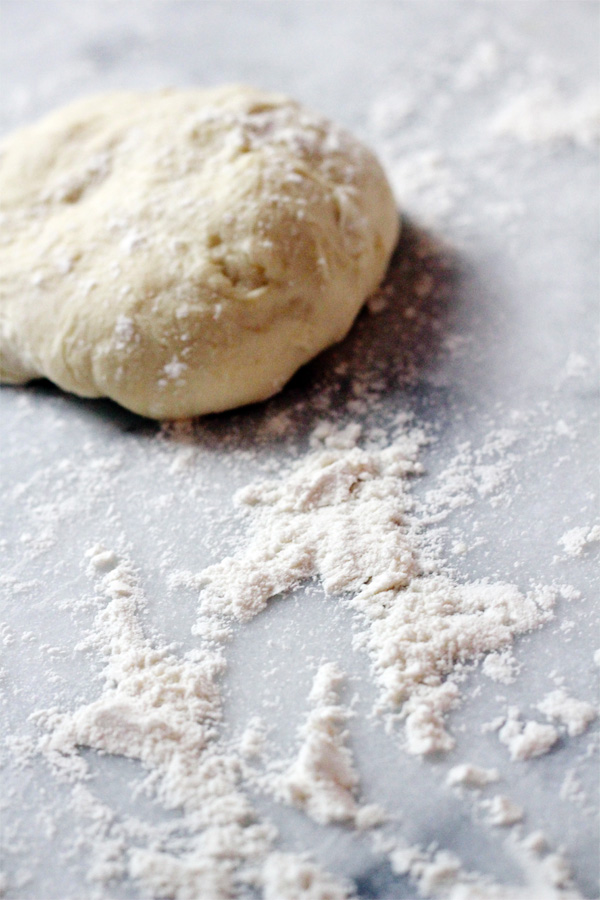
Start this dough the day before or 2 days before you plan to use it.
In the bowl of a standmixer fitted with the dough hook, combine the yeast, sugar, olive oil, and water. Dump in the flour and salt. Start by mixing the dough on low until everything is combined. Increase the speed of the mixer to medium low and knead for 5 minutes. Alternatively, you can knead the dough for 7-10 minutes by hand, on a lightly floured surface.
The dough should pull away from the sides of the bowl and be smooth and elastic. Transfer to a container with a lid and refrigerate for 24-48 hours. Make sure the container allows room for the dough to double in size. After this first slow rise, dough balls can be frozen until ready to use. Defrost in refrigerator for 6 to 8 hours.
Everyday Tomato Sauce
This sauce was born out of one of those “use what I had on hand” kitchen moments. I was forced to make tomato sauce with limited ingredients, and ended up with one of the best sauces I’d ever tasted. This makes a big batch (far more than you need for several pies), so freeze what you don’t use and throw the rest over pasta, chicken, roasted eggplant… the list goes on.
- 1 28 oz can diced tomatos
- 1 14 oz can diced tomatoes
- 1 small/medium onion diced
- 3 generous tablespoons minced garlic (fresh!)
- 1 1/2 tsp dried oregano
- 1 tsp salt
- 1/2 tsp red pepper flakes
- extra virgin olive oil
Generously coat a heavy bottomed pot with olive. Set to medium heat. Add in onions and cook, stirring occasionally, until soft and transluscent, about 10-12 minutes. Add in garlic and oregano, and cook for another minute or so until garlic is soft and fragrant. Add in tomatoes, salt, and red pepper flakes. Stir to combine and simmer for 25-30 minutes until sauce has thickened. Once cooked, remove from heat, and blend using an immersion blender. You want the sauce to be slightly chunky, not super smooth, so don’t blend completely. Alternatively, you can transfer half of the sauce to a blender, blend, and then transfer back to the pot. Taste an adjust for seasonings (additional salt may be necessary).
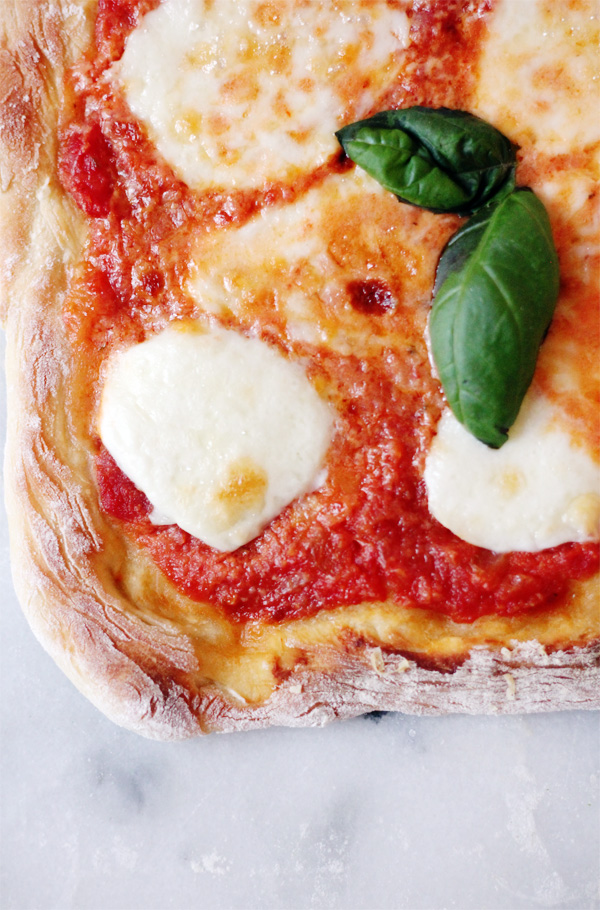
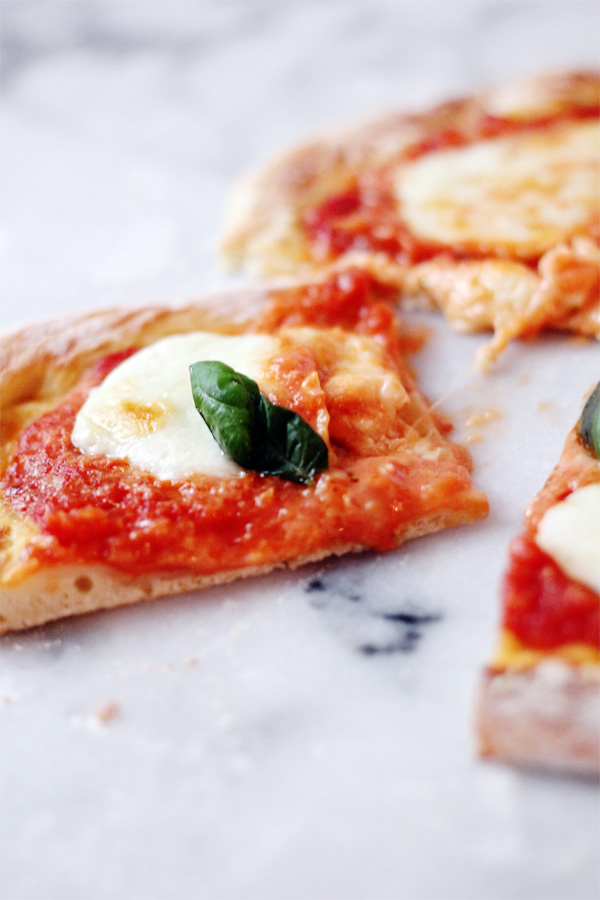
Classic Margherita Pizza
- 1/3 cup everyday tomato sauce
- 1/2 of a medium ball fresh mozzarella, sliced
- 1/4 grated pecorino cheese
- Fresh basil leaves
- Additional olive oil, grated cheese, red pepper flakes - and whatever other toppings you like
Position an oven rack on the very top rung of your oven. If you’re using a pizza stone, now’s the time to put it in the oven. Preheat your oven to 450• roughly one hour before you plan to bake it. At the same time, remove the dough from the fridge and place it on a well floured countertop.
After an hour, press out or roll out your dough to a 10 inch round. Place the dough on the back of a flour-dusted baking sheet (or pizza peel if you have it). Brush with olive and top with tomato sauce, spreading evenly. Distribute mozzarella across the pie, then top with the gated pecorino. Finish with another drizzle of olive oil. (The key here is to not weigh down your pizza too much. While I’ve noted measurements above, do your best to adjust to the size of your pie. Over time you should go by feel rather than exact measurements.)
Because I find it challenging to transfer my pie from a pizza peel or the back of a flour’ed baking sheet, I do the following: Once the oven is preheated, place your prepped pie on the baking sheet into the oven. Bake for 8 minutes, rotating halfway through. After 8 minutes, the pie should be sturdy enough to slide directly onto your oven rack. Slide onto the rack, andb ake for an additional 4-5 minutes so the bottom cooks. Then, turn your broiler on and broil for 3-5 minutes, until cheese is golden brown and crust is deeply bronzed on the edges.
Once cooked, let pizza rest for 5 or so minuten to let cheese set. Top with fresh basil and serve immediately.

Pizza is one of the hardest things to make! I haven’t mastered it yet either. The recipe looks awesome and I loved your points about failure. It’s true, failure and growth kind of go hand in hand.
I so enjoyed this post. Two of my favorite things- a bit of self awareness and pizza all wrapped together!I’ve never tried making my own pizza crust; I usually just buy one from Trader Joe’s, but I think I might have to give this a try.
Do you find a difference using a pizza peel? I’ve always wondered about those pizza stones, but I have such limited space that it seemed like a nice-ity and not a necessity.
You definitely should! You could totally nail it, girl :). I’ve never used a pizza peel. I used to have a pizza stone and then cracked it in the oven during one of my failed pizza attempts….haha. I feel you on the limited space, so right I just use the back of a baking sheet, and then put my pie directly on the oven grate to crispy up the bottom. Sure, my bottom crust could probably be crispier, but I still love it!
When I was younger my dad used to make us homemade pizzas. I would love to start making my own as well (pizzeria pizzas are starting to lose their luster!) I’m liking the sound of your crust recipe; I may try it sometime this week! Thanks for sharing!
Ashley
Sunday Brunch
Your pizza looks great! Just wanted to contribute an Italian trick: Dust cornmeal on your baking sheet or peel when putting in the oven. Your pizza will never stick then! Buon appetito!
Thanks so much for this tip, Maria! Running out to buy cornmeal now :).
Pingback: Friday Link Love - Two Places at Once
Pingback: Life is Messy. Make Garlic Knots. | Clara Persis