
 "IMG_5414_2")
I am so excited to tell you about this bread. I know people have been going on and on about no knead bread (for like 5 years- no really), but it never gets old to me. If you haven’t made it, you need to, because I promise- it will be a huge boost to your ego. I wasn’t particularly in need of a ego boost this week, but nonetheless, this loaf put a lift in my step.
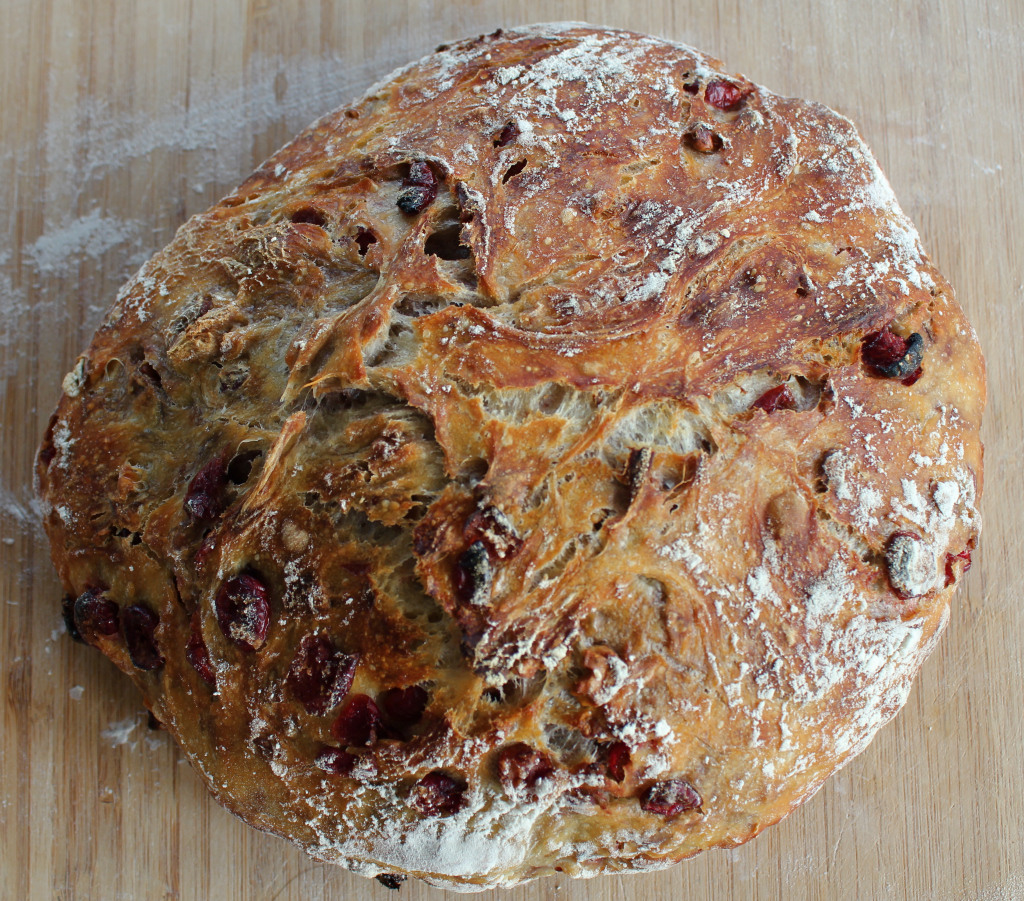
My latest creation was a cranberry walnut boule, inspired by Lahey’s Carrot Loaf with walnuts and currants. I was so intrigued by this recipe, but since I didn’t have carrot juice on hand, I did without. Suffice it to say this came out of the oven at around 3 pm Tuesday, and at 4 pm Wednesday, only a skinny heal of the bread remained. On the one hand it’s a little scary to think about how much bread I’ve consumed, but more importantly, this is a clear indication of how good this bread is. We’ve been eating it with a bit of butter, but I think it would also be wonderful served with a smear of good cream cheese.
Lastly- a tip for storing this bread! If you plan to eat it within 1-2 days of baking (which you likely will), simply cut slices from end of the loaf. To store, turn the boule upright (cut side down), on a cutting board. The rest can remain exposed!
Cranberry and Walnut No Knead Boule adapted from Jim Lahey’s Carrot Loaf
Makes 1 10″ round loaf
3 cups all purpose flour
1 1/4 tsp table salt
1/4 tsp instant yeast
3/4 cup dried cranberries
3/4 cup coarsely chopped walnuts
1 1/2 cups plus 2 T water
In a large bowl mix together the flour, salt, yeast, cranberries, and walnuts. Pour in 1 1/2 cups of water and mix dough together with your hands or a wooden spoon until you have a slightly sticky and shaggy dough (about 30 seconds). The dough may need a bit more water, so add one tablespoon at a time until it’s slightly sticky.
Cover and let rise for 12- 18 hours, until the dough has more than doubled in size and the surface is studded with bubbles. I tend to always do mine for the full 18 hours (my schedule just seems to work out that way). I’d recommend the full length to achieve the results I did, but I’m sure if you went a few hours shorter- it would be fine.
After the first rise, dump the dough onto a generously floured surface (it may need a little coaxing out of the bowl, just pull gently). Liberally flour your hands and shape into a ball (as close to one as you can get- it will be fine!). Next, take a dish towel, lay it flat, and liberally flour the center of the towel. Transfer the dough to that spot, and gently fold the towel over the dough. Let rise for an additional 1-2 hours until the dough has doubled in size once again, and holds an impression when gently poked with a finger. If it springs back, let it rise 15 minutes more.
At least 30 minutes before you’re ready to bake your bread, place a large casserole dish or dutch oven (I use this one) in the middle rack of oven, and set temperature to 450 degrees. You want this dish screamin’ hot.
When your dough is done rising, open the oven, and with pot holders carefully place the pot on your stove. Set aside the lid. Working quickly but gently, unfold the towel and invert dough into the pot. Place the lid back on and put the dish back in the oven. Bake for 25 minutes. Then, remove lid, and bake for an additional 15-20 minutes uncovered, until the crust is a deep golden brown. Once achieved, remove pot from oven, carefully remove boule from pot, and let cool completely before slicing.

Recommended by us
Goodness, this looks amazing! I am typically too intimidated by bread recipes to try them, but I’m totally going to give this one a whirl! Thanks Clara!
You must! You won’t believe how easy it is- promise.
Oh my lord that bread looks great! I’d munch this down in no time at all. The photos are great too.
This looks so delicious. I might have to give this a try.
Gorgeous photos! I’m salivating. Of course, with no oven in China, I’ll just have to enjoy looking. Also, I featured you on my blog today, as I’ve really enjoyed reading your posts: http://littlesacredspace.wordpress.com/2011/09/29/little-bloggers-that-could/
Pass on the blogger love if you’re game!
Oh wow, thank you! I am so touched.
Ridiculously hearty!
Pingback: Plate to Pixel: Hard Light vs. Soft Light | Channeling Contessa
this bread looks beautiful and so colorfully delicious — i found this recipe from your plate to pixel post and i can definitely see what kind of mood you wanted this bread to represent
This bread is delicious! The hardest part is waiting for it to rise, but it’s worth the wait!
Tip: If using glass, make sure your glass casserole dish can withstand 450 degrees. I took mine out of the oven to put in the dough after heating it, and it shattered when I set it on the stove! After looking it up, I then realized that most Corning Ware covered casserole dishes can only withstand a maximum of 400 degrees. The good news is that I am now the proud owner of a cast iron Dutch Oven!
This bread looks absolutely amazing! I’m surprised it even lasted a day (it definitely wouldn’t have lasted that long in my apartment). I’ll have to try this very soon!
Beautiful photos too!
I made this last week and is an amazing loaf of bread. I used 1 cup of carrot juice and 1/2cup water. I am a juicer so not a problem. I also used bread flour along with whole wheat and rye flour. I can’t wait to make this for Thanksgiving. It goes well with cheese and turkey breast for lunch and cream cheese for breakfast.
After reading all the splendid comments and feedback I tried this recipe. At the beginning, the dough looked fantastic, however, after letting it rise for approximately 14 hours it had a funky smell. All in all, I followed through with the instructions and in the end I got a bad horrid tasting bread; ridiculously hard on the outside (I couldn’t even pierce the top properly without having the knife bounce back) and raw in the inside. A waste of time,effort,EXPENSIVE ingredients,money and electricity. Very disappointed.
After reading all the splendid comments and feedback I tried this recipe. At the beginning, the dough looked fantastic, however, after letting it rise for approximately 14 hours it had a funky smell. All in all, I followed through with the instructions and in the end I got a bad horrid tasting bread; ridiculously hard on the outside (I couldn’t even pierce the top properly without having the knife bounce back) and raw in the inside. A waste of time,effort,EXPENSIVE ingredients,money and electricity. Very disappointed.
Hi Jane,
I’m so terribly sorry you had such a terrible experience with this recipe- I know there is nothing more frustrating than throwing good (expensive) food away. Because I’m not physically there in your kitchen, it’s hard for me to tell what went wrong- perhaps it had something to do with the yeast? I adapted my recipe from this video- http://www.youtube.com/watch?v=LhOiEOVs2yc (the original recipe from Jim Lahey). Perhaps by watching it you’ll be able to figure out what went wrong? Again, so sorry!
Best,
Clara
Was very excited to try this recipe. I made two loaves and followed the directions exactly using the same Dutch ovens. Epic fail. My bread became very hard and hopelessly stuck to the sides and bottom. It darkened way too fast on the outside as well. Some edits are needed for those using gas ovens (temp adjustments) and something should be said about greasing the vessel! Too bad, that was a lot of wasted time and I’ve got a heck of a cleanup job ahead.
Hi Susan- I am so terribly sorry you experienced those results with this recipe. There is truly nothing more frustrating! Since I’m not there right with you, it’s hard for me to tell what went wrong unfortunately. But I adapted my recipe from this recipe- http://www.youtube.com/watch?v=LhOiEOVs2yc- a video with Jim Lahey and Martha Stewart showing exactly how he makes his bread. Perhaps you could review and that will clarify what went wrong? I’m going to go back and look myself and re-test this recipe to see what I can do differently. Again, so sorry!
Best,
Clara
I made this bread for the first time today, and it came out AMAZING!!! I’m so happy with this recipe!! It was super easy to follow. I will definitely be making this again, thanks for sharing!
Pingback: Project Cookbook: Holiday Turkey, Gruyere, Cranberry Relish
Clara, my wife found this recipe yesterday and put it together in about 5 minutes. She followed the recipe to a T and it was total perfection. The biggest problem is we couldn’t stay away from it. It was so delicious. She has put together another loaf and it is now rising to be baked tomorrow. She used the same baker that you show above. It came out perfectly. Fabulous recipe! although it means I’ll have to work out at the gym longer to work off my cranberry addiction!
Ha- I’m so glad to hear that Robb! I know… it is a really addictive piece of food. Who can resist hot fresh out of the oven homemade bread? Enjoy!
Clara, the second loaf my wife made that I mentioned above was total perfection as well. We took it easy on the number of times that we just had to have a slice. Today is the 3rd day for the loaf and it is still so fresh. Just a few minutes ago, she put together yet another loaf, this time with cranberries and pecans for a different spin. We are having company for dinner tomorrow evening and she thought she’d give the bread a try with pecans. Once again, thanks for such a great recipe.
Just checking amount of yeast you suggest. 1/4 tsp of yeast didnt seem much and now when i check my dough it hasnt doubled in size at all after 18 hours. Is this a typo?
Trying this recipe out now. After 18 hours my dough is pinkish and hasnt risen very much. First time using instant yeast, I wasnt sure if i was supposed to add water to it first or not. Also when adding the 1 1/2 water I felt like the dough was getting too runny (I could be wrong this is my first bread) it seemed like it needed more flour than water, so I decided to only out 1 1/4 c water. Hope I didnt ruin it also i had no idea where the bread was supposed to rise so i left it in my oven (it was off) over night. Maybe you should make a video showing how to make this bread, i’m sure i could get it perfect if you did. I’ll let you know how it comes out.
When I do my artisan bread, I pull out some dough, form it into a ball and lay it on my non-stick baking mat. After a rise, dusting with flour and slashing, I transfer it to my hot stone, baking mat and all. After about 15 min., I pull out the baking mat so the bread is now directly on the stone and then continue baking it. Do you think this would work for this bread?
I am almost ready to bake…do you really bake it at 450 that whole time??
I cannot wait to make this over the weekend! I think Im going to put this in my christmas cookie and goodie basket that i give out!
Hi Clara, I just finish making the dough , I will post the outcome.
Thanks
Naz
follow up on my bread, it came out ok, my family likes it , I am going to practice more
Thanks Clara
I made this for the first time today, and it is great! I used too much flour when creating the ball after the first rise, so when I make it again I will not be QUITE so “liberal”, but all in all, it was super easy and tasty. I doubt it will last long.
To address some of the issues others have had, I just want to be clear that I am using a $30 dutch oven from Tuesday Morning, didn’t grease the inside at all, and have a gas oven. No problems with any of those things for me. And the ingredients were not that expensive - the walnuts were priciest at $5+ for a little bag, but since I didn’t even use the whole bag I wasn’t unhappy with the cost.
Pingback: Salvaging the day with great bread
“2 T water” what exactly is it
2 tablespoons!
I have already made this bread around 10 times. I love it! Thank you Clara.
However, I do have a question.
My bread always ended up with a layer of excess flour on the surface. How did you manage to get those flour off and have the bread looking so golden bread?
Best recipe ever! I’m adding more sugar to sweeten it. But awesome bread