Happy Saturday! A few weeks back I posted about a handful of happy purchases I just made, everything from cook books to an ice cream maker. But the item that got the most attention was the Clarisonic Mia. Many of you asked me to share about my experience with it, and now that I’ve started using the cleanser, I thought I’d provide my feedback. I was hesitant about getting a Clarisonic. It seemed like one of those things that had only extreme reviews- either really good, or really bad. But so far, so good! Here are the details:

  • One of the biggest complaints I heard was that when you first start using the tool it can really irritate your skin, making you break out. That side effect seemed really frustrating, since wasn’t the machine supposed to do the opposite? Luckily I haven’t experienced anything like that so far (which is surprising, since I have pretty sensitive/oily skin), but I think the reaction kind of makes sense and I would have been fine had it happened. To me it’s like getting a facial- it cleans your skin really deeply but exposes everything at the same time, so it takes your skin a few days to work itself out.
  • Though my skin seems to be taking to Clarisonic well, I only use it once a day- even though it says you can use it twice. I like using it at night before I go to bed.
  • The Clarisonic comes with its own brand of face wash. I didn’t want to have to continually use and purchase their face wash so I asked around to see if other cleansers work. The consensus was yes, and so far my Bioré daily scrub is great with it.
  • I’m a pretty dedicated face washer. No matter how tired I am, I can’t go to sleep without a freshly scrubbed face (and teeth!). The Clarisonic makes it so much easier though. It’s far less work to turn on this little thing that cleans your face for you. Plus it has a timer, so you know exactly when to stop. Done and done!
  • I truly feel like this little thing can clean my face about a million times better than I can. The soft magical brush just glides over your skin, evenly cleaning all areas and applying just enough pressure to get rid of the grime without harming your skin. My skin already feels smoother and my complexion more balanced after using it a handful of times.

So there you have it! Needless to say I love this thing. I believe I hit all the high points, but if you have a specific question feel free to leave a note in the comments or email me. Hope you’re have a wonderful Saturday! xx

Hello! A few crickets this week, huh? Sorry guys, it’s been a busy past few days. Most weeks I reach Thursday and I don’t know where the week has gone. This week though, not so much. So much happened between Monday and today, I am so so ready for this week to be over. Almost!

So in the mean time, since my head can’t take anything too complicated, let’s talk about tomato sauce. Basic tomato sauce. I realized last weekend, when prepping this sauce for a dish, I couldn’t remember the last time I purchased store bought tomato sauce. I’ve gotten into the habit of making it myself because it gives me much more control over the flavor.  Plus, even though I’m usually using crushed tomatoes, it feels fresher and less processed. All good things in my book!

Perhaps whipping up a simple sauce from scratch seems a little daunting to you, so this post is both to tell you that it’s not- and show you how to do it. And if you want to take it a step further, I highly recommend making the sauce and incorporating it into this pasta dish. It is so so good!

Basic Homemade Tomato Sauce

This recipe makes a big batch, likely a bit more than you need for a pound of pasta, but you can always freeze the leftovers.

  • 2 28 oz containers crushed tomatoes (Note: you can use diced, you’ll just want to break them up a bit in a food processor first)
  • 1 medium yellow onion, minced
  • 6 large cloves garlic, minced
  • 1/2 cup red wine
  • 2 tsp salt
  • 1/2 tsp sugar
  • heaping 1/4 tsp red pepper flakes (add more if you like)
  • olive oil
Generously coat the bottom of a good size heavy sauce pan with olive oil. Add in the onions, set the flame to medium high, and let them cook for a solid 15 minutes, stirring occasionally, until they’re really soft. Add in the minced garlic, stir to combine, and let cook for an additional minute or two until fragrant. Add in the tomatoes, wine, salt, sugar, and red pepper flake, and stir well to combine. Let simmer for at least 30 minutes, but 45- 1 hour if you can. Serve immediately with pasta, or let cool and store in the fridge. This sauce is even better the next day, so you can definitely make it ahead. It can also be stored up to five days in the fridge.


My recent cookbook purchases arrived this Friday and I got right to work using them in the kitchen this weekend. I couldn’t resist trying a recipe from the Joy the Baker Cookbook first. Joy’s book is stunning and sweet and everything you could dream it would be. Her recipes are incredible and I love how she wrote an intro for each one that mirrors the language and style of her blog posts. It’s such a treat!

I began with the pancake section of her book and selected her recipe for a Dutch baby. Have you ever made a Dutch baby? Oh my goodness, they’re amazing. A Dutch baby is a big pancake that you bake in a hot skillet in the oven. They puff up into a beautiful golden brown pancake that’s perfect for two or as a sweet side at brunch.  They’re ideal for brunch entertaining because there’s zero flipping involved! Just prep the batter and set it to bake shortly after your guests arrive. Joy’s version featured toasted coconut and bananas, but since I had neither of those on hand I made a simple vanilla infused blueberry sauce. This breakfast served as the perfect Sunday treat; I can’t wait to try all the other recipes in the book!

Dutch Baby with Vanilla Blueberry Sauce inspired by Joy the Baker Cookbook

Serves 2 (makes one 10 inch pancake)
For the Dutch Baby:

  • 2/3 cup flour
  • pinch of salt
  • 3 eggs
  • 2/3 cup milk
  • 3 T unsalted butter

For the Blueberry sauce:

  • 1 cup blueberries (fresh or frozen)
  • 1/3 cup water
  • 1 tsp vanilla extract
  • 2 T sugar

Make the blueberry sauce: Combine all ingredients in a small sauce pan. Set to medium low heat and let simmer for 12-15 minutes until berries have broken down.

Make the Dutch baby: Preheat the oven to 400°. Place the rack in the upper third of the oven. Put a 10 inch cast iron or oven safe skillet on the rack and let warm while you prepare the batter.

In a large bowl whisk together the eggs and sugar and thick and pale. Whisk in the milk, and then the dry ingredients. Stir well to combine.

Once oven is heated, carefully removed the pan from the oven and place the butter in the pan. Using potholders, swirl the butter around the pan so it’s completely melted. Quickly pour in the batter and put the pan back in the oven. Bake for 15- 18 minutes until browned and puffed. Top with blueberry sauce and serve immediately with powdered sugar or maple syrup.

I woke up to 65° weather again today. I can hardly believe it! I can’t remember the last time we experienced such spring temps in March. I’ve started working a few days a week in a shared office space, and this warm weather could not be better timed with my “new commute.” I love seeing all the little kids playing outside and the dogs parks are filled with so many happy pups. We took these pics last weekend, and though they’re not in Brooklyn, they definitely capture the feeling that the city has finally woken up from its winter slump.

Next week is exceptionally busy, which will mean a little work this weekend, but luckily we’ve got a dinner party with friends planned. I’m headed to the store today to pick up all the items for our feast, I can’t wait! Hope you have a wonderful weekend! xx


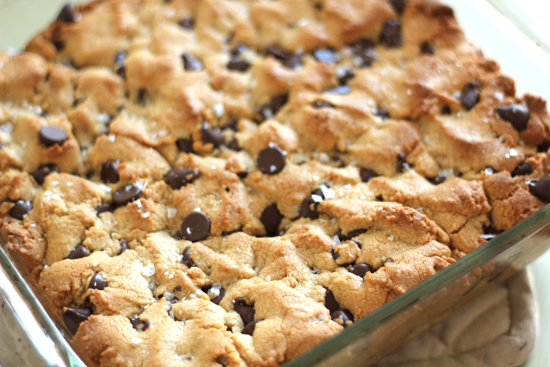
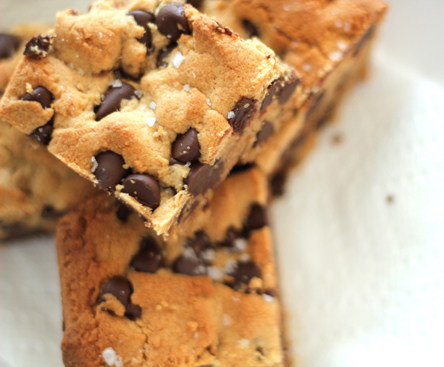
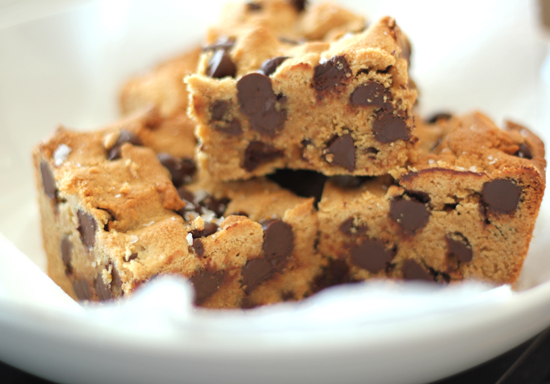
Things I’m not good at: making desserts that don’t include sea salt. How can you resist? Ever since I made these bars I’ve been craving a sweet and salty confection in bar form. I think I’ve become a bit of a lazy baker, but why go to the trouble of scooping out cookies when you can just put all the dough in one pan? WAY easier. And pretty, don’t you think?

This recipe calls for a full cup of creamy peanut butter and a whole bag of chocolate chips, tucked within a 9×9 pan. That translates into a very thick and decadent bar, so consider yourself warned! I recommend having plenty of regular milk or almond milk on hand before making them.  Enjoy!

Salted Peanut Butter Chocolate Chip Bars inspired by the Brown Eyed Baker
Makes 12 bars

  • 1 1/2 cups all-purpose flour
  • ½ teaspoon baking soda
  • 1/2 teaspoon sea salt
  • ¾ cup light brown sugar
  • 1 cup creamy peanut butter
  • ½ cup unsalted butter, at room temperature
  • ½ cup granulated sugar
  • 1 egg
  • 1 teaspoon vanilla extract
  • 1 12 oz bag semisweet chocolate chips
  • flaked sea salt for sprinkling

Preheat oven to 350 degrees F. Grease a 9×9 or 9×8-inch baking pan, set aside. (Tip: I like to use the wrapper from the butter to grease the pan!)

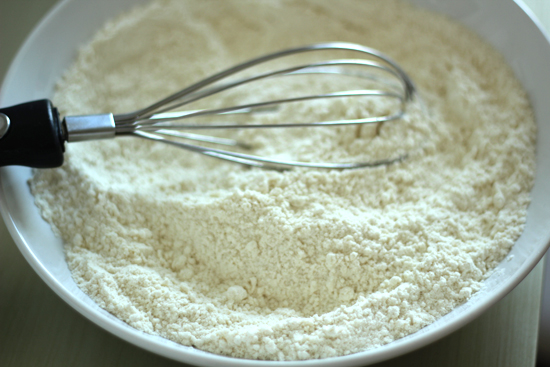
In a small bowl whisk together the flour, baking soda and salt, set aside.

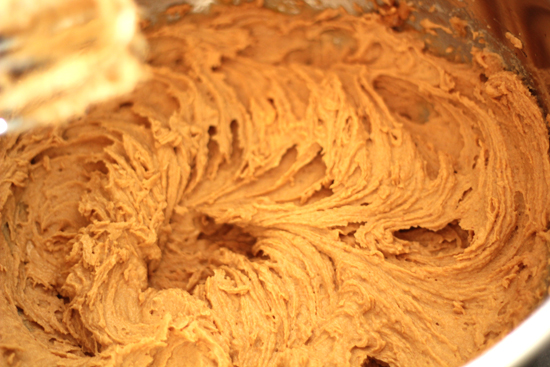
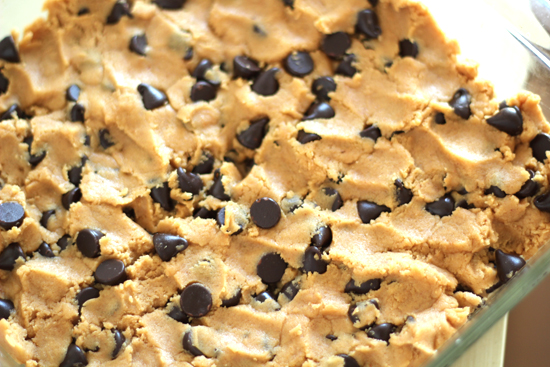
In the bowl of an electric mixer, cream together the brown sugar, peanut butter, butter and granulated sugar on medium speed until light and fluffy. Add the egg and vanilla extract and mix until combined. Reduce speed to low and add the dry ingredients, mixing only until the flour is just incorporated. Using a rubber spatula, mix in the chocolate chips.

Turn out the mixture into the prepared pan and press into an even layer. Sprinkle the top with sea salt. Bake for 25-28 minutes, just until the center is set and top is golden brown. Cool completely in the pan. Cut into bars and store at room temperature in an airtight container.